
For the first two weeks of each term, students enrolled in specific programs and classes have exclusive access to borrow Apple iPads. Eligible students may come directly to the Checkout Desk to borrow them, or they may use instructions (provided to program coordinators or class instructors) to request delivery. The iPads are lent for the full term.
At Week 3, all remaining iPads are opened to general borrowing on a first-come, first-served basis at the Checkout Desk. Loans are for the remainder of the term.
Useful tips & tricks for the iPad
1. First, Customize The Dock

Fill the Dock with your most used apps and you’ll rarely need to go to the Home screen to launch apps.
2. Swipe Up to Go Home
Just swipe up to go to the Home screen.
3. Access App Switcher

A short swipe up will bring up the Dock. And if you swipe up from the bottom of the screen to the middle of the iPad screen, you’ll reveal the App Switcher.
4. Quit Apps
When you’re in the App Switcher, just swipe up on an app preview to force quit the app.
5. Use Apps in Floating Windows

One really useful feature is Slide Over. When an app is open, just swipe up to open the Dock and drag an app over to the app that’s already open. The new app will open in a narrow window. You can move it around and keeping the app that’s below it.
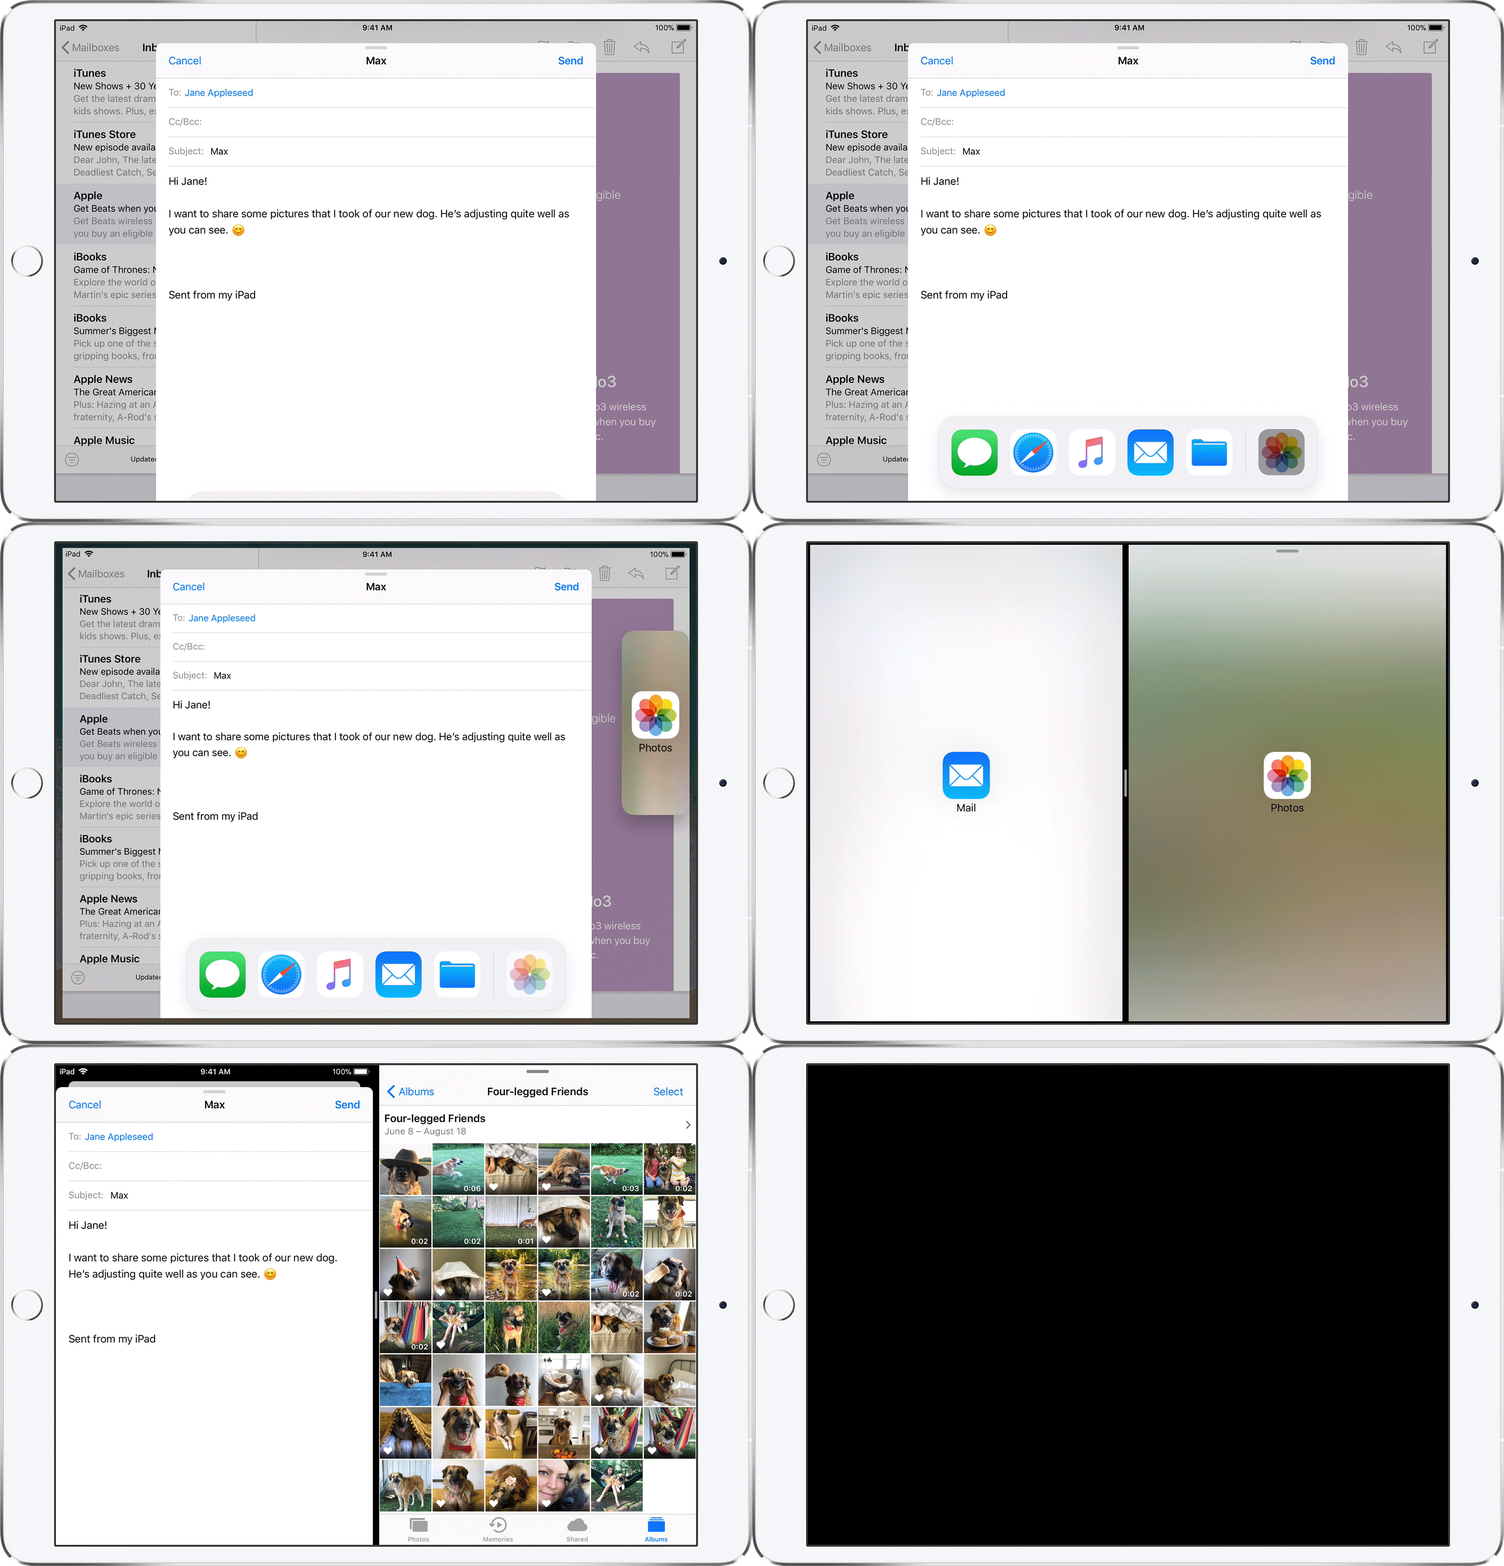
6. Use Split View for Multitasking

The screen on the iPad is great for using two apps side by side. After opening an app, bring up the Dock and drag an app icon from the Dock to either the left or right edge of the screen, till you see a dark box. Release your finger and the app will be docked to the side. You can use the handlebar to resize each app.
7. Drag and Drop Files or Text Between Apps

Once you have two apps running side by side, you can drag and drop images, text, and files from one app to another.
8. Watch Videos in Picture in Picture
This feature is enabled by default. When you’re watching a video in an app like Netflix, just hit the Home button. The video will continue to play in a small floating window. You can resize it and move it around.
9. New Way to Access Control Center

To access Control Center, swipe down from the right edge of the status bar.
10. Quick Gesture For App Switching

You can quickly switch between apps by using a small arc style gesture. Just swipe left to right, making a small semi-circle and you’ll be able to switch to the most recent app.
11. Quickly Access Spotlight From Anywhere

Open Spotlight search by swiping down on either the home screen or lock screen. When you start, Spotlight will begin to suggest apps, Google searches, settings, etc.
12. Use Apple Pencil To Take Notes on Lock Screen
The new iPads support the first generation Apple Pencil. Go to Settings -> Notes and you can configure it to automatically launch a new note when you tap the iPad screen with your Apple Pencil on the Lock screen.
13. Close Multiple Tabs in Safari

Long-press on the tabs icon to bring up a window. From here, you can close all tabs, open a new tab/window, open a new private tab/window, or move a tab to a group.
14. Lock Notes

One of the lesser known features of Apple Notes is the ability to lock notes using Touch ID. Open a note, tap on the Share button and select Lock note to get started.
15. Add Website To Home Screen

There are some things that still work better in Safari and negate the need to install a special app. In such a case, you can add websites as Home screen shortcuts. Open the website, tap on Share button and select Add to Home screen.
16. Record Your iPad Screen

You can easily record your iPad screen to show a process to someone. Go to Settings -> Control Center -> Customize Controls and turn on the Screen Recording toggle. Now, open the Control Center and tap Screen Recording toggle to start recording the screen (and the audio if you want).
17. How to Take a Screenshot
Use the Power and Home button at the same time to take a screenshot. Once a screenshot is taken, you’ll see a preview of it in the bottom-left corner. You can tap on it to quickly edit it or share it.
18. Use The Smart Keyboard and Master The Keyboard Shortcuts

The iPad is easier to use with keyboard shortcuts, especially if you’re dealing with a lot of text.
Tap the "Settings" icon on the iPad home screen.
Tap the "General" tab on the left of the "Settings" screen.
Tap the "About" option on the top of the right side of the screen.
Tap the "Name" option at the top of the "About" screen.
Enter your desired name into the field and tap "done" in the bottom right.
Your iPad should now have your desired name.